About the model
The Northrop T-38 was first introduced in 1959 as a fighter trainer for the USAF. 50 years later this airplane is still flying and training pilots, although the USAF plans to replace it at some point. Check out this model.
Pre-Build
Opening the box one is greeted with the usual trumpeter marketing paper, basic full sheet instructions, and a color callout in full color. Pulling those out and set those aside to reveal the sprues beneath, each in its own individual bag. Contents include 4 grey sprues, a clear sprue, a PE fret, and a pair of decal sheets.
Starting with sprue "A" is the fuselage halves, along with the main gear bays and doors, and finished out with an external fuel tank. I'll be skipping the tank for this build.
Sprue "B" contains the wings which are upper and lower for each, the tailplanes and a few other bits.
Moving onto sprue "C" we have a lot of the detail of the model, including the cockpit parts, the tub, ejection seats, instrument panels along with things like the access ladder, landing gear struts, and wheels. At first glance, everything appears to be very sharp in detail with no flash to be seen really.
The last grey sprue, "E" includes the intakes, exhaust nozzles and a couple of other detail bits on the kit.
Sprue "D", the clear parts have 3 parts for the canopy and a few marker lights, as the canopies can be positioned open on this model which is always nice!
PE parts include seatbelts and canopy mirrors. Finishing out the tour is the decal sheets, the first which includes instrument panel details, and the other for the markings. While the instrument panel decals look good I think I'm going to skip them in favor of hand painting the details on, I prefer this but to each their own.
The kit includes a pair of markings, but I won't be using those either as I purchased aftermarket decals for this one. while serving I was stationed at Columbus AFB and so it was only appropriate to mark this one after one of the aircraft I got to see and interact with on a daily basis.
Post-Build
While the kit was very simple in terms of complexity the details were still very abundant. Things like the cockpit and the seats and such could probably have been done better with some aftermarket but the end result was very convincing. Overall I love the looks of the model, it's a great piece of memory for me.
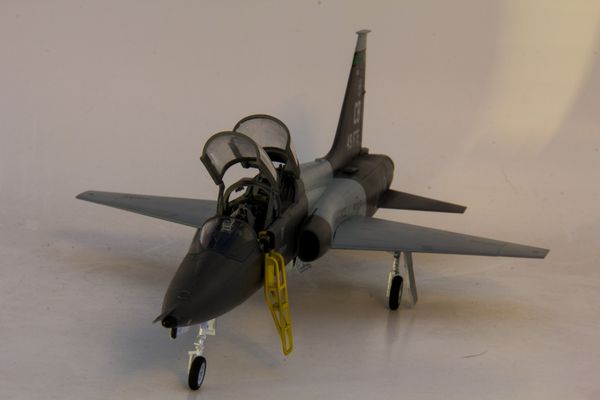
Final Images
If you wanna see more of the model including the build process head over [here]()