My first foray into the WWI and biplane categories was this Se.5a from Eduard. Did I mention it was also my first Eduard kit and first time with PE as well? Many things were learned during the build of this beautiful (and sadly unfinished forever model) aircraft. Its been many months now since I've finished this build and so its hard to remember a lot of the details but i'll give it my best.
Pre-build
First thing greeting you is the box of course. The front of the box depicts a dogfight between a british and german aircraft. Quite inticing right? Wanting to see what was in store for me I wasted no time digging into the contents of the box, where much to my surprise there wasn't as much as I had figured there would be. The kit is comprised of two grey sprues, a clear sprue, two PE frets, and a sheet of decals, cartograf of course!
Construction of the aircraft is made up of two halves of fuselage, an upper and lower wing (both single piece) and many other bits of detail throughout. The larger PE fret contains very well done seatbelts along with many detail bits to accent the wings. The smaller fret of PE got tossed as it was for a varient that I didn't build. Most of the clear sprue ended up on the upper and lower surfaces of the wings, with just a couple going onto the aircraft itself.
    !Decals
Post-Build
During the build of this model i encountered many issues that discouraged me and almost made me toss it but i kept on going knowing that it was my first and perfection was far from a reality (not that i go for that anyways). Almost all the problems i ran into were due to my own lack of experience with the subject type and not knowing how or when to do what. For example painting...
The kit fit was amazing, course i expected that from the legendary Eduard, with very little work needed to clean up sprue attachment points and very minimal flash was found if at all. Everything basically dropped together into place and so very little glue was required. The only exception I can think of was fitting the lower wing to the fuselage halves wasn't the best, but with some work it fit great.
Now about that painting..... One thing I've always done on aircraft models is build and then paint after, something I did with this one as well and didn't stop and thinking about how to paint above the fueslage below the upper wing, and the surfaces of the wings facing each other. Had i left the top off till final assembly this process would have gone much quicker, but lesson learned there.
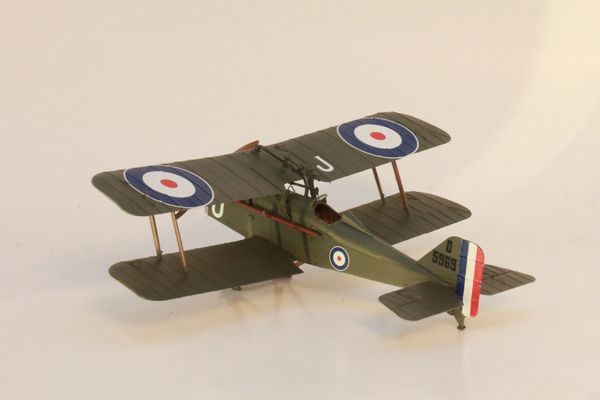
As you might notice as well the rigging doesn't exist on this model as i decided to skip it for sake of my sanity really. I'm very happy and proud of the work i've done on this model and really wanted to rig this up, but couldn't source a good wire size and wasn't quite sure how to tackle attaching it where need be, it overwhelmed me! Next time though.
Where are its wheels you might ask? Well the carpet monster claimed one! Right as I was taking the plane to the photobooth one fell off and to this day has yet to be seen again.... i'm not convinced one of the cats didn't run with it though! I kept the decals and color guide for them along with the other wheel in hopes it appears again someday and I can complete it, if not it'll just sit on skids!
Due to the painting blunder its also a good thing I decided to go with a fairly simple paint scheme. In this case that of Lt. C.H.R. Lagesse of the 29th squadron in Saint Omer, France in 1918.
Final Images
If you would like to see the final result of this model head over [here](/models/model/eduard-1-48-se-5a-hispano-suiza)